
This article explains how to build a mobile application, install and run it on an Android mobile device, and introduces the Flutter Framework.
Introducing Flutter
The application is in Flutter, which allows you to build, test, and deploy mobile, web, desktop, and embedded apps from a single codebase.
Flutter is an open-source framework by Google, and you can find free tutorials here.
In this example, the editor is Visual Studio Code, with the Flutter extension installed to support and debug the Flutter project.
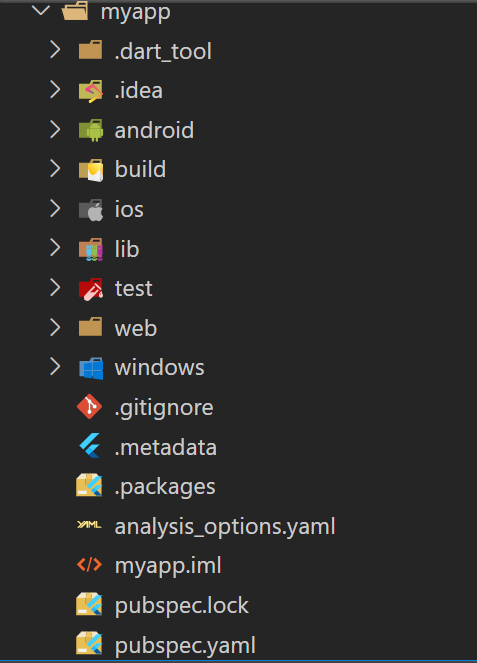
This is the structure of a Mobile project in Flutter. As you can notice, the project contains both versions of iOS and Android.
Building the app for release
You have these two possible release formats when publishing to the Play Store:
- App bundle
- APK
In this post, we will release the app in APK format and install it on the smartphone.
Start a new terminal in Visual Studio Code and go to the app’s Flutter project. In this case, we are located in my app folder.
Run the command:
flutter build apk --build-name 1.2.3 --build-number 99
Building and releasing the app in the APK format will take a few seconds. As a result, you should go to the Visual Studio Code workspace, where the application files are located. In this example, the files are located in:
./myapp/build/app/outputs/flutter-apk
Installing an app in Mobile
This process includes connecting your Computer to your Mobile via cable so you can copy and paste the APK file into your Mobile. In this example, I copied the file:
app-armeabi-v7a-release.apk
I allocated the APK file and pressed Install using the My Files browser on my Mobile.

Sometimes, the system requires confirmation that an application is a trusted one. In this case, it is because we developed it.
After installation, you can see the icon on your Mobile’s home screen.
I recommend adding and customizing a Launcher Icon to fit your application function.
For more information regarding Building and Releasing the Mobile app on Android, read this documentation in Flutter.
